How to View a Delegated Calendar in Roundcube
Last modified: 2025 June 10
Overview
This document explains how to set up a delegated calendar in Roundcube.
This document is only valid for cPanel & WHM version 118 and earlier. In cPanel & WHM version 120, we removed the ability to add and delegate calendars in Roundcube and added this functionality to other interfaces. For more information, read our cPanel Deprecation Plan documentation.
Prerequisites
-
This guide assumes that you have already set up at least one calendar delegate in cPanel’s Calendar Delegation interface (cPanel » Home » Email » Calendar Delegation).
-
The Calendar Delegation feature only appears if your hosting provider installs the Calendar and Contacts Server plugin and enables the Calendar Delegation feature.
-
This feature is not available for Exchange ActiveSync.
How to View a Delegated Calendar in Roundcube
In order to view a delegated calendar in Roundcube, you must add the calendar owner’s calendar to the delegate’s Roundcube account. To do so, perform the following steps:
Get the calendar owner’s calendar URL
-
Ensure that you are in the Webmail interface.
- If this is the first log in, the Webmail interface will appear.
- If you are in the Roundcube interface, click cPanel Webmail Home. The Webmail interface will appear.
-
Under the Edit Your Settings section in the Webmail interface, click Configure Calendar and Contacts Client. The Calendar and Contacts interface will appear.
-
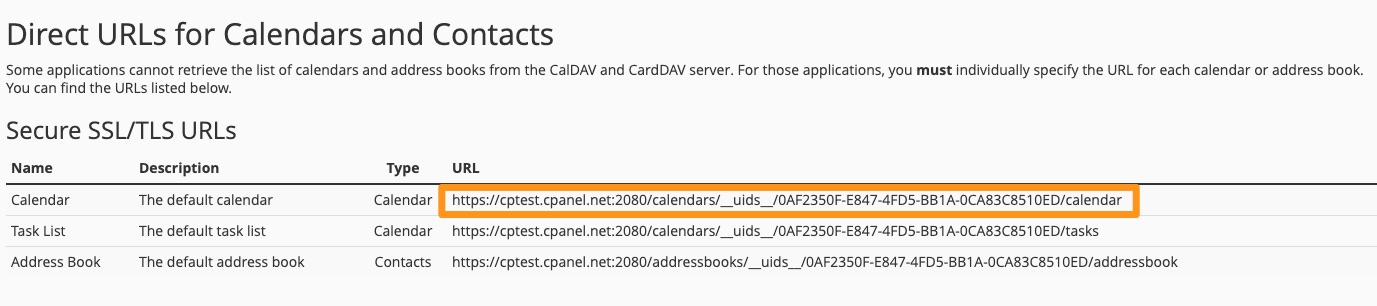
Scroll to the Direct URLs for Calendars and Contacts section. Find the Calendar row in the Secure SSL/TLS URLs table.
-
Copy the URL under the URL column for the Calendar item in the table.
Add the calendar owner’s calendar to the delegate’s Roundcube calendar
-
Ensure that you are in the Roundcube interface.
- If this is the first log in, the Webmail interface will appear. If Roundcube is your default Webmail client, you can click the Roundcube logo under the Open your inbox section. Otherwise, you can select the Roundcube logo from the Change your webmail client section. The Roundcube interface will appear.
- To open your inbox every time that you log in to Webmail, select the Open my inbox when I log in checkbox.
- If this is the first log in, the Webmail interface will appear. If Roundcube is your default Webmail client, you can click the Roundcube logo under the Open your inbox section. Otherwise, you can select the Roundcube logo from the Change your webmail client section. The Roundcube interface will appear.
-
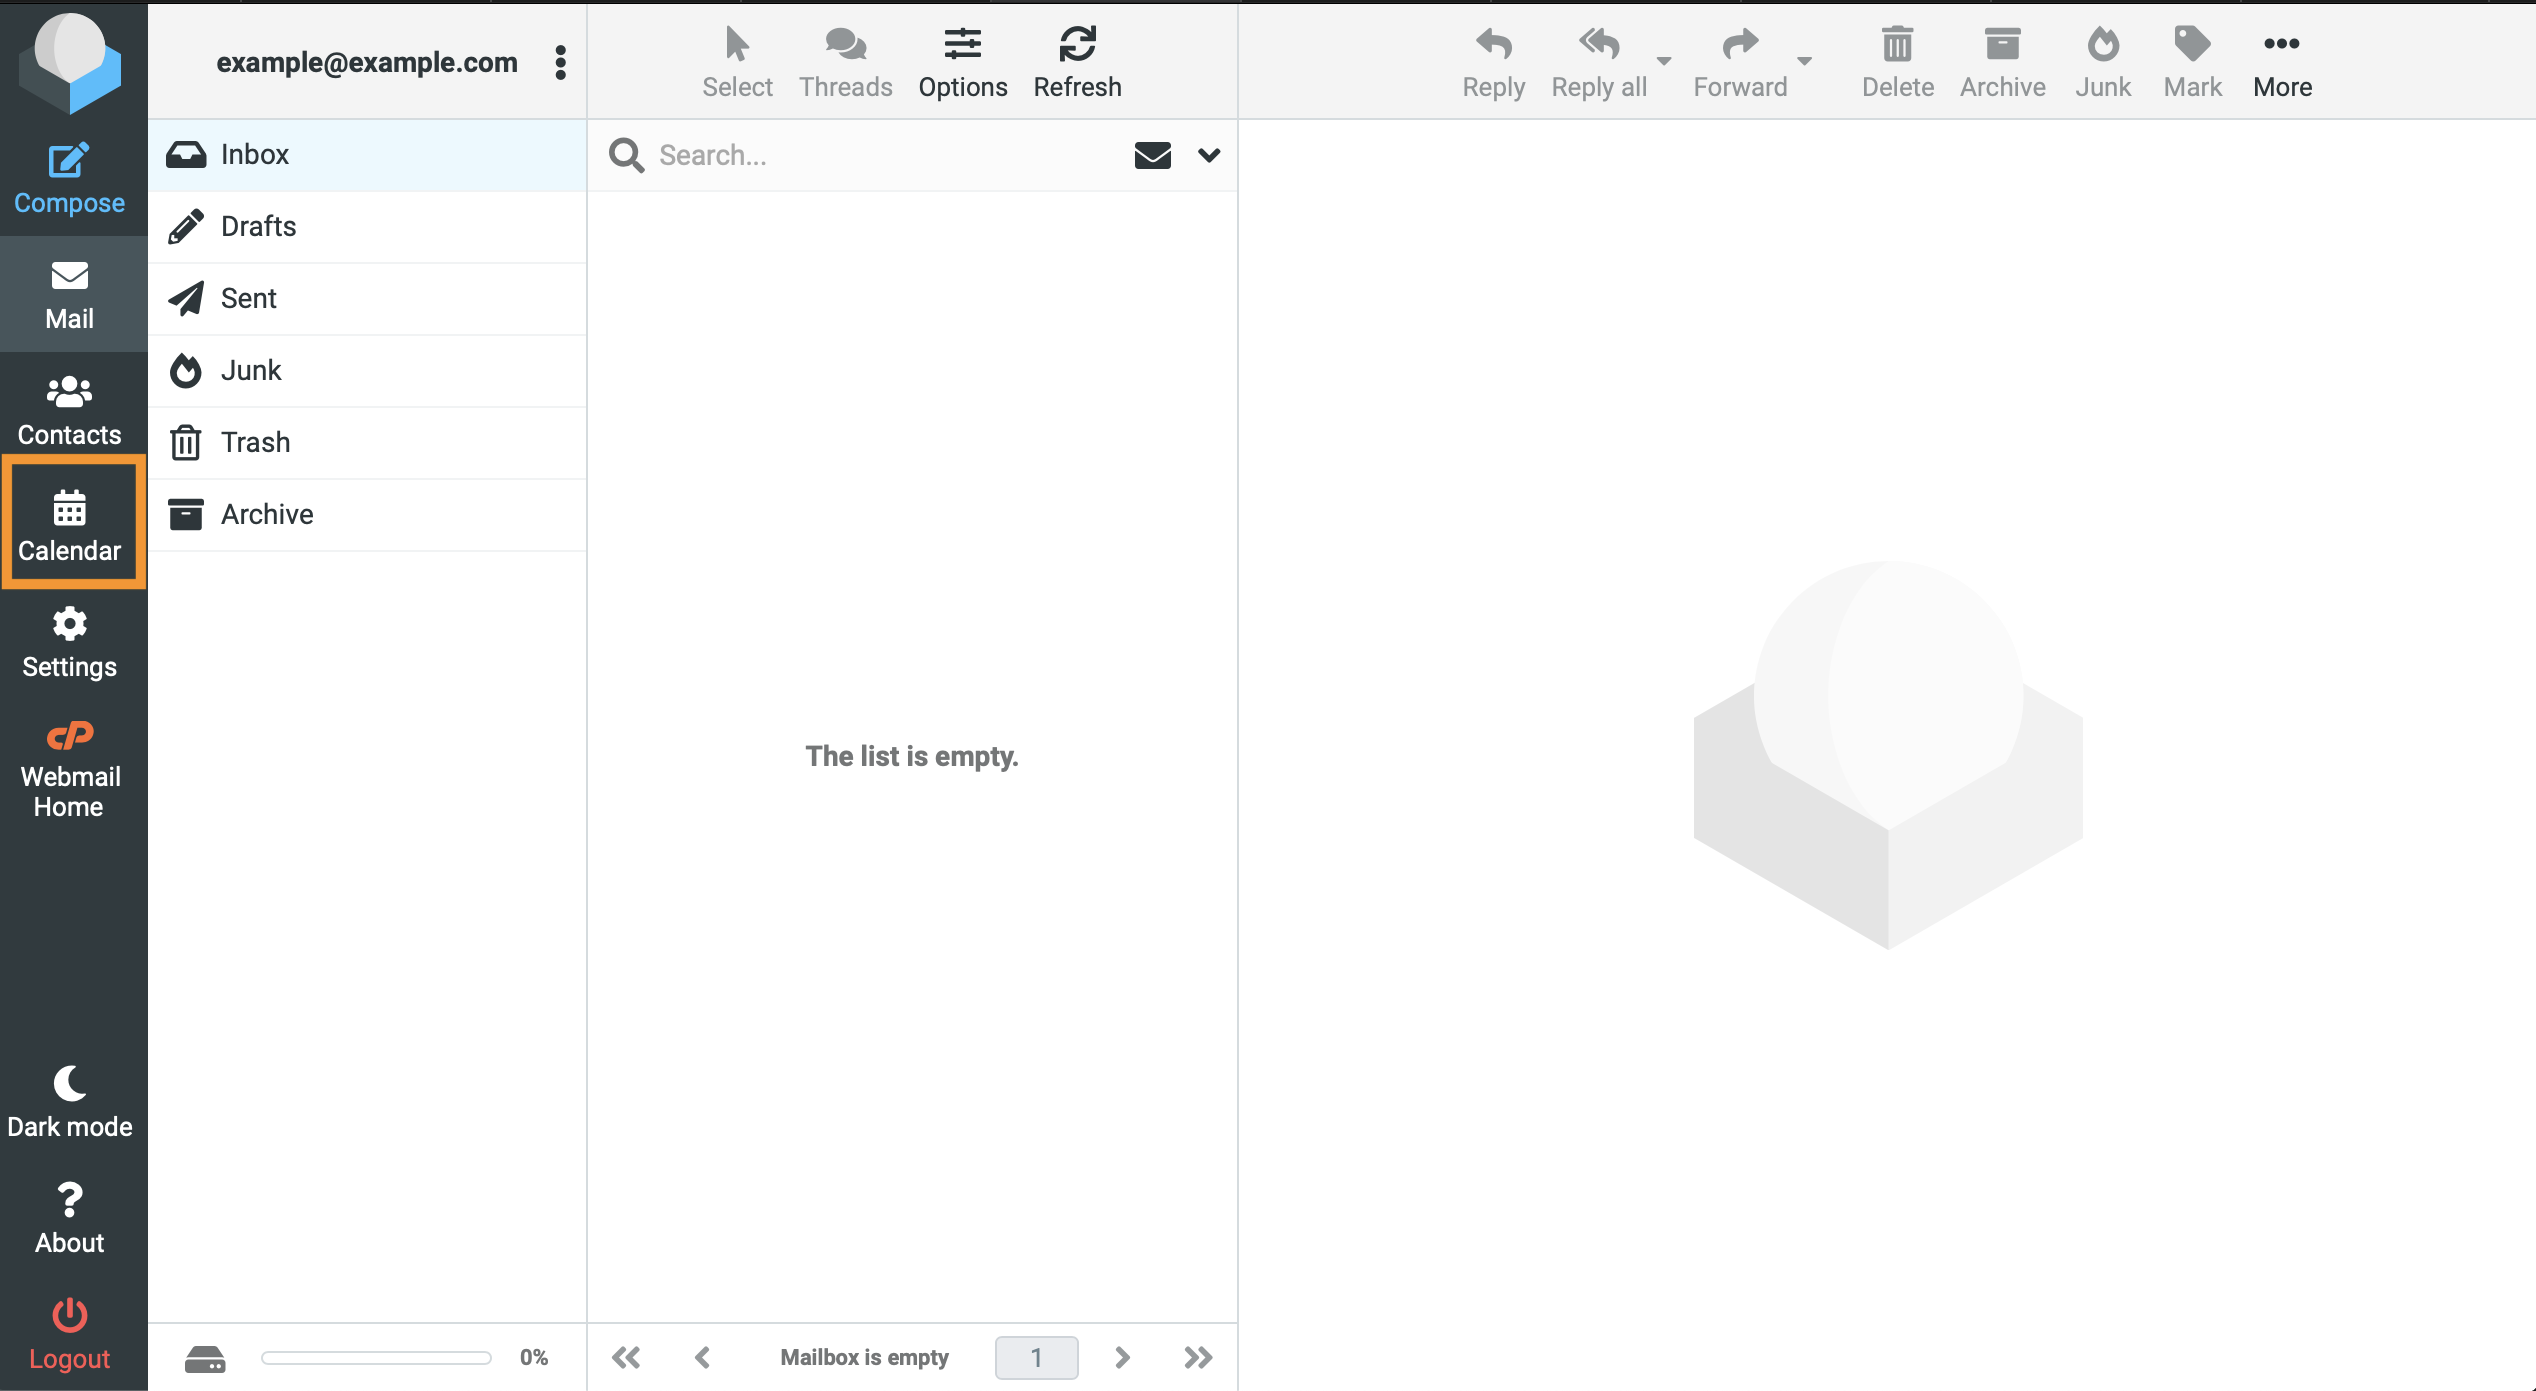
In the Roundcube interface, click Calendar on the left menu. The Roundcube Calendar interface will appear.
-
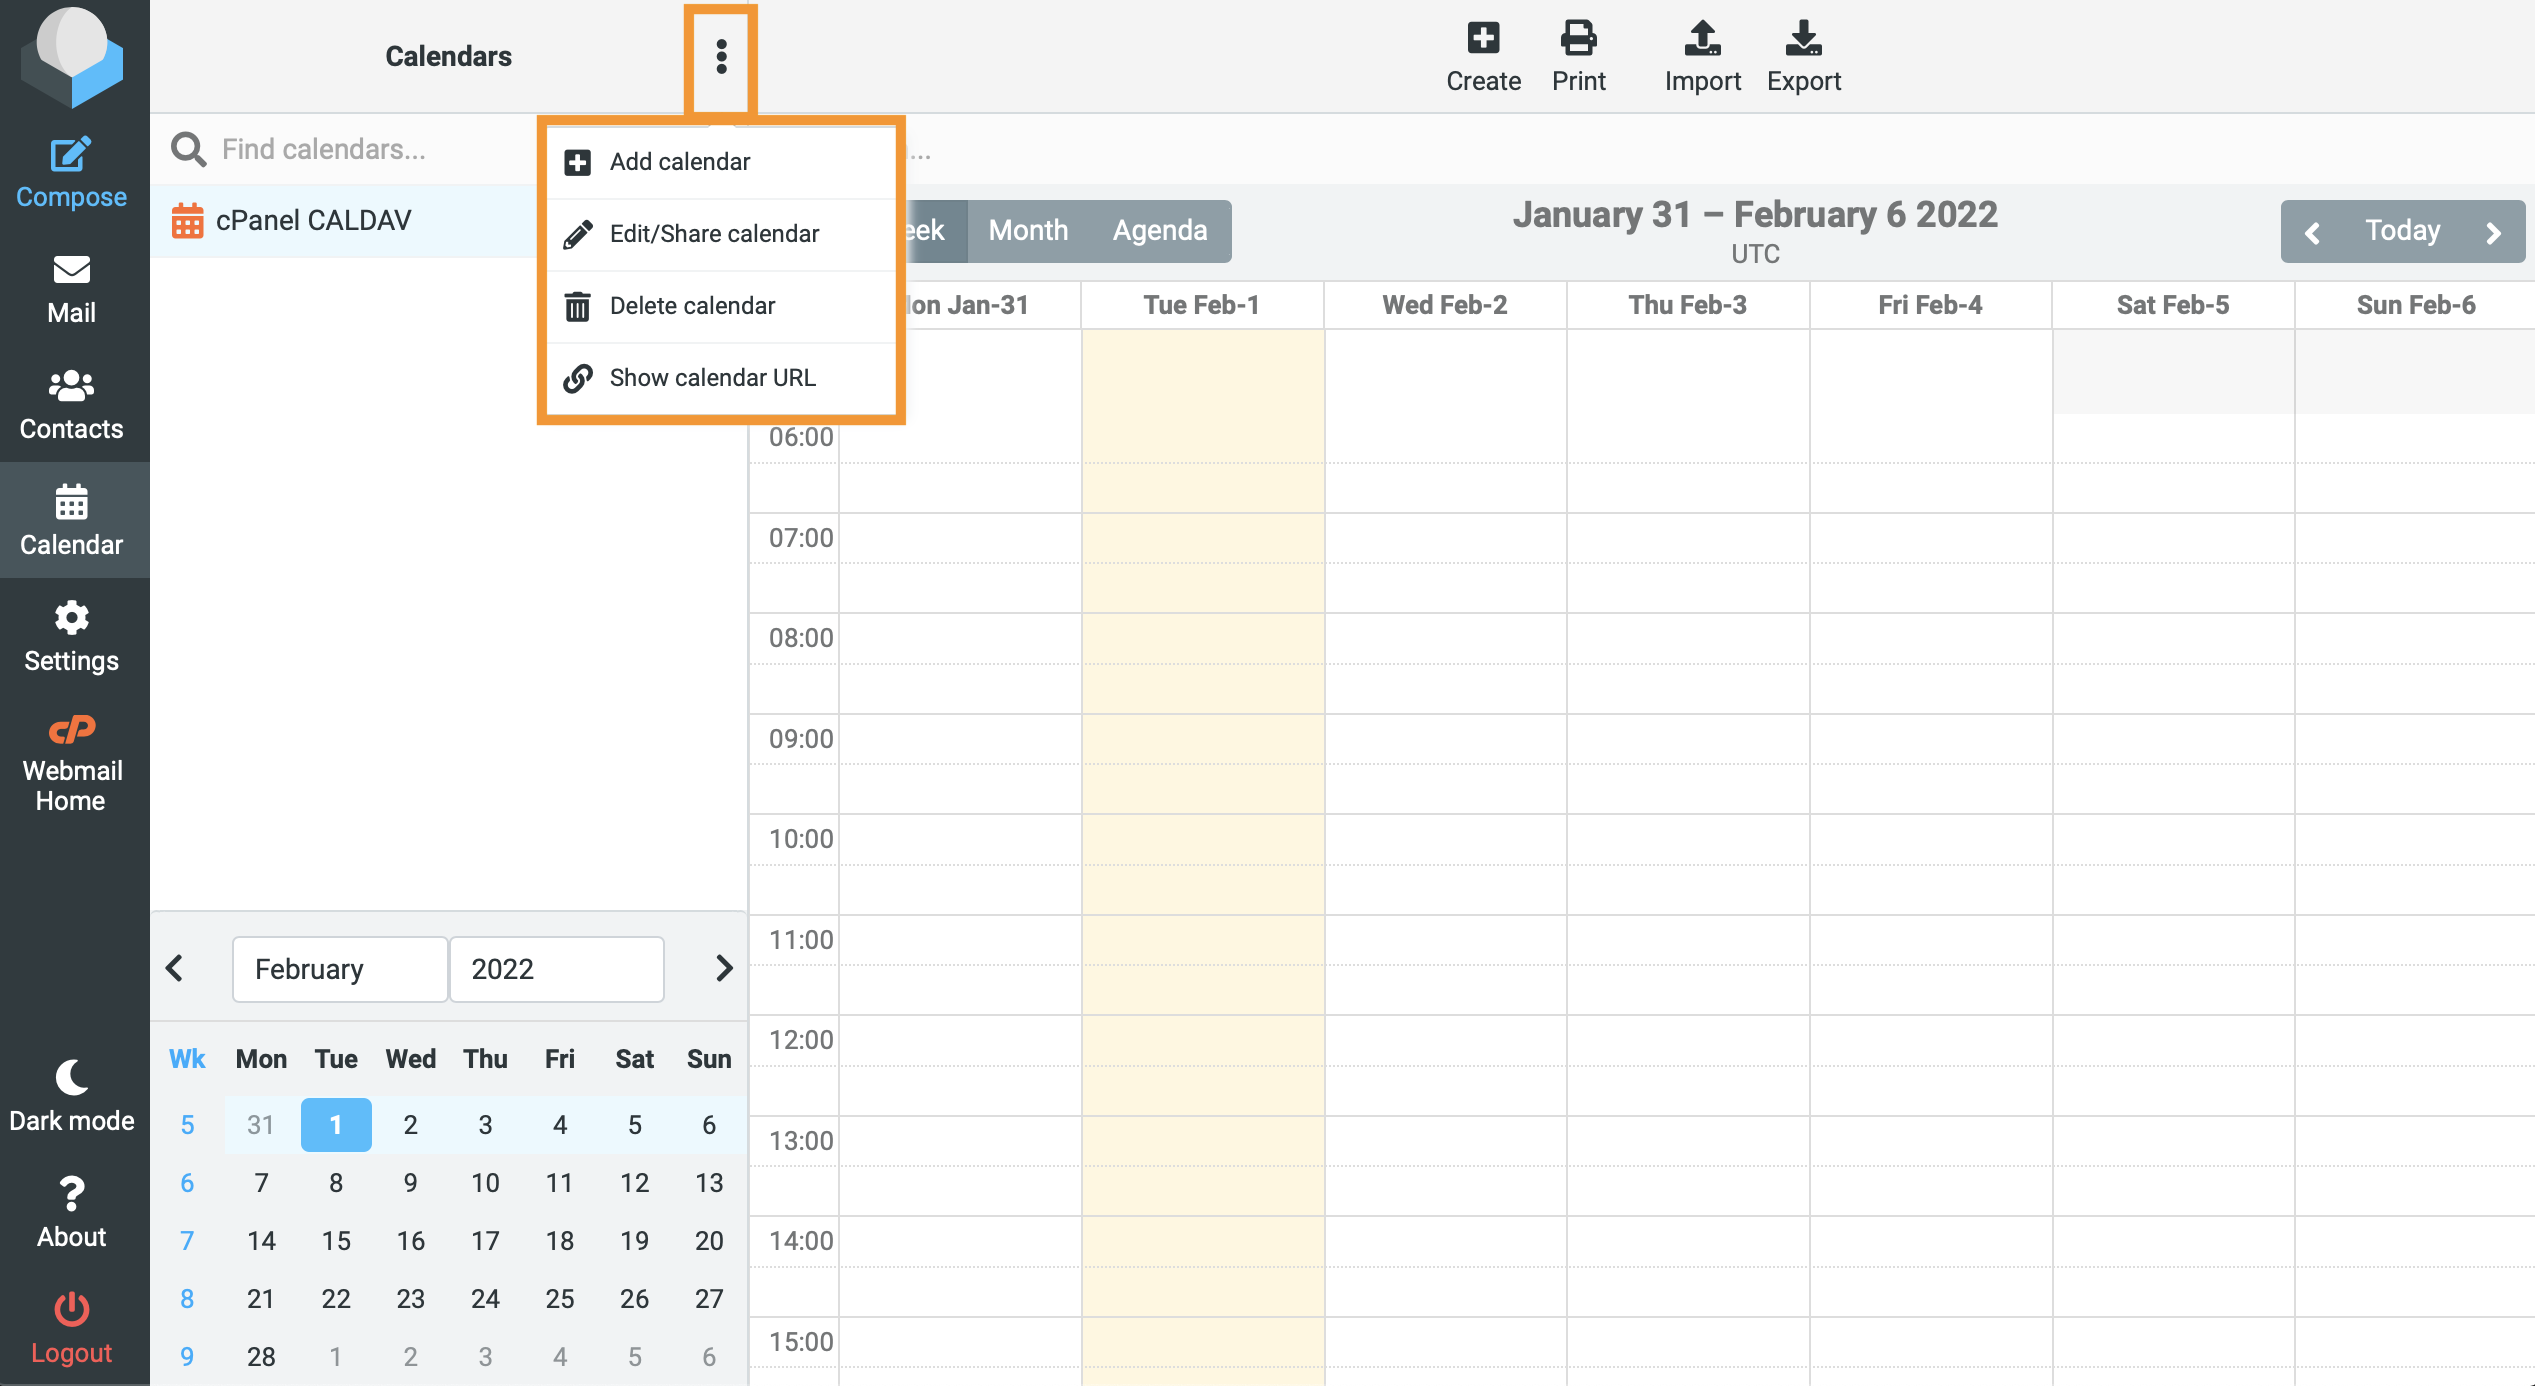
In the Roundcube Calendar interface, navigate to Calendars at the top of the interface. Click the menu icon (
 ). A menu will appear.
 -
Select
 Add Calendar from the menu. The Create new calendar interface will appear.
-
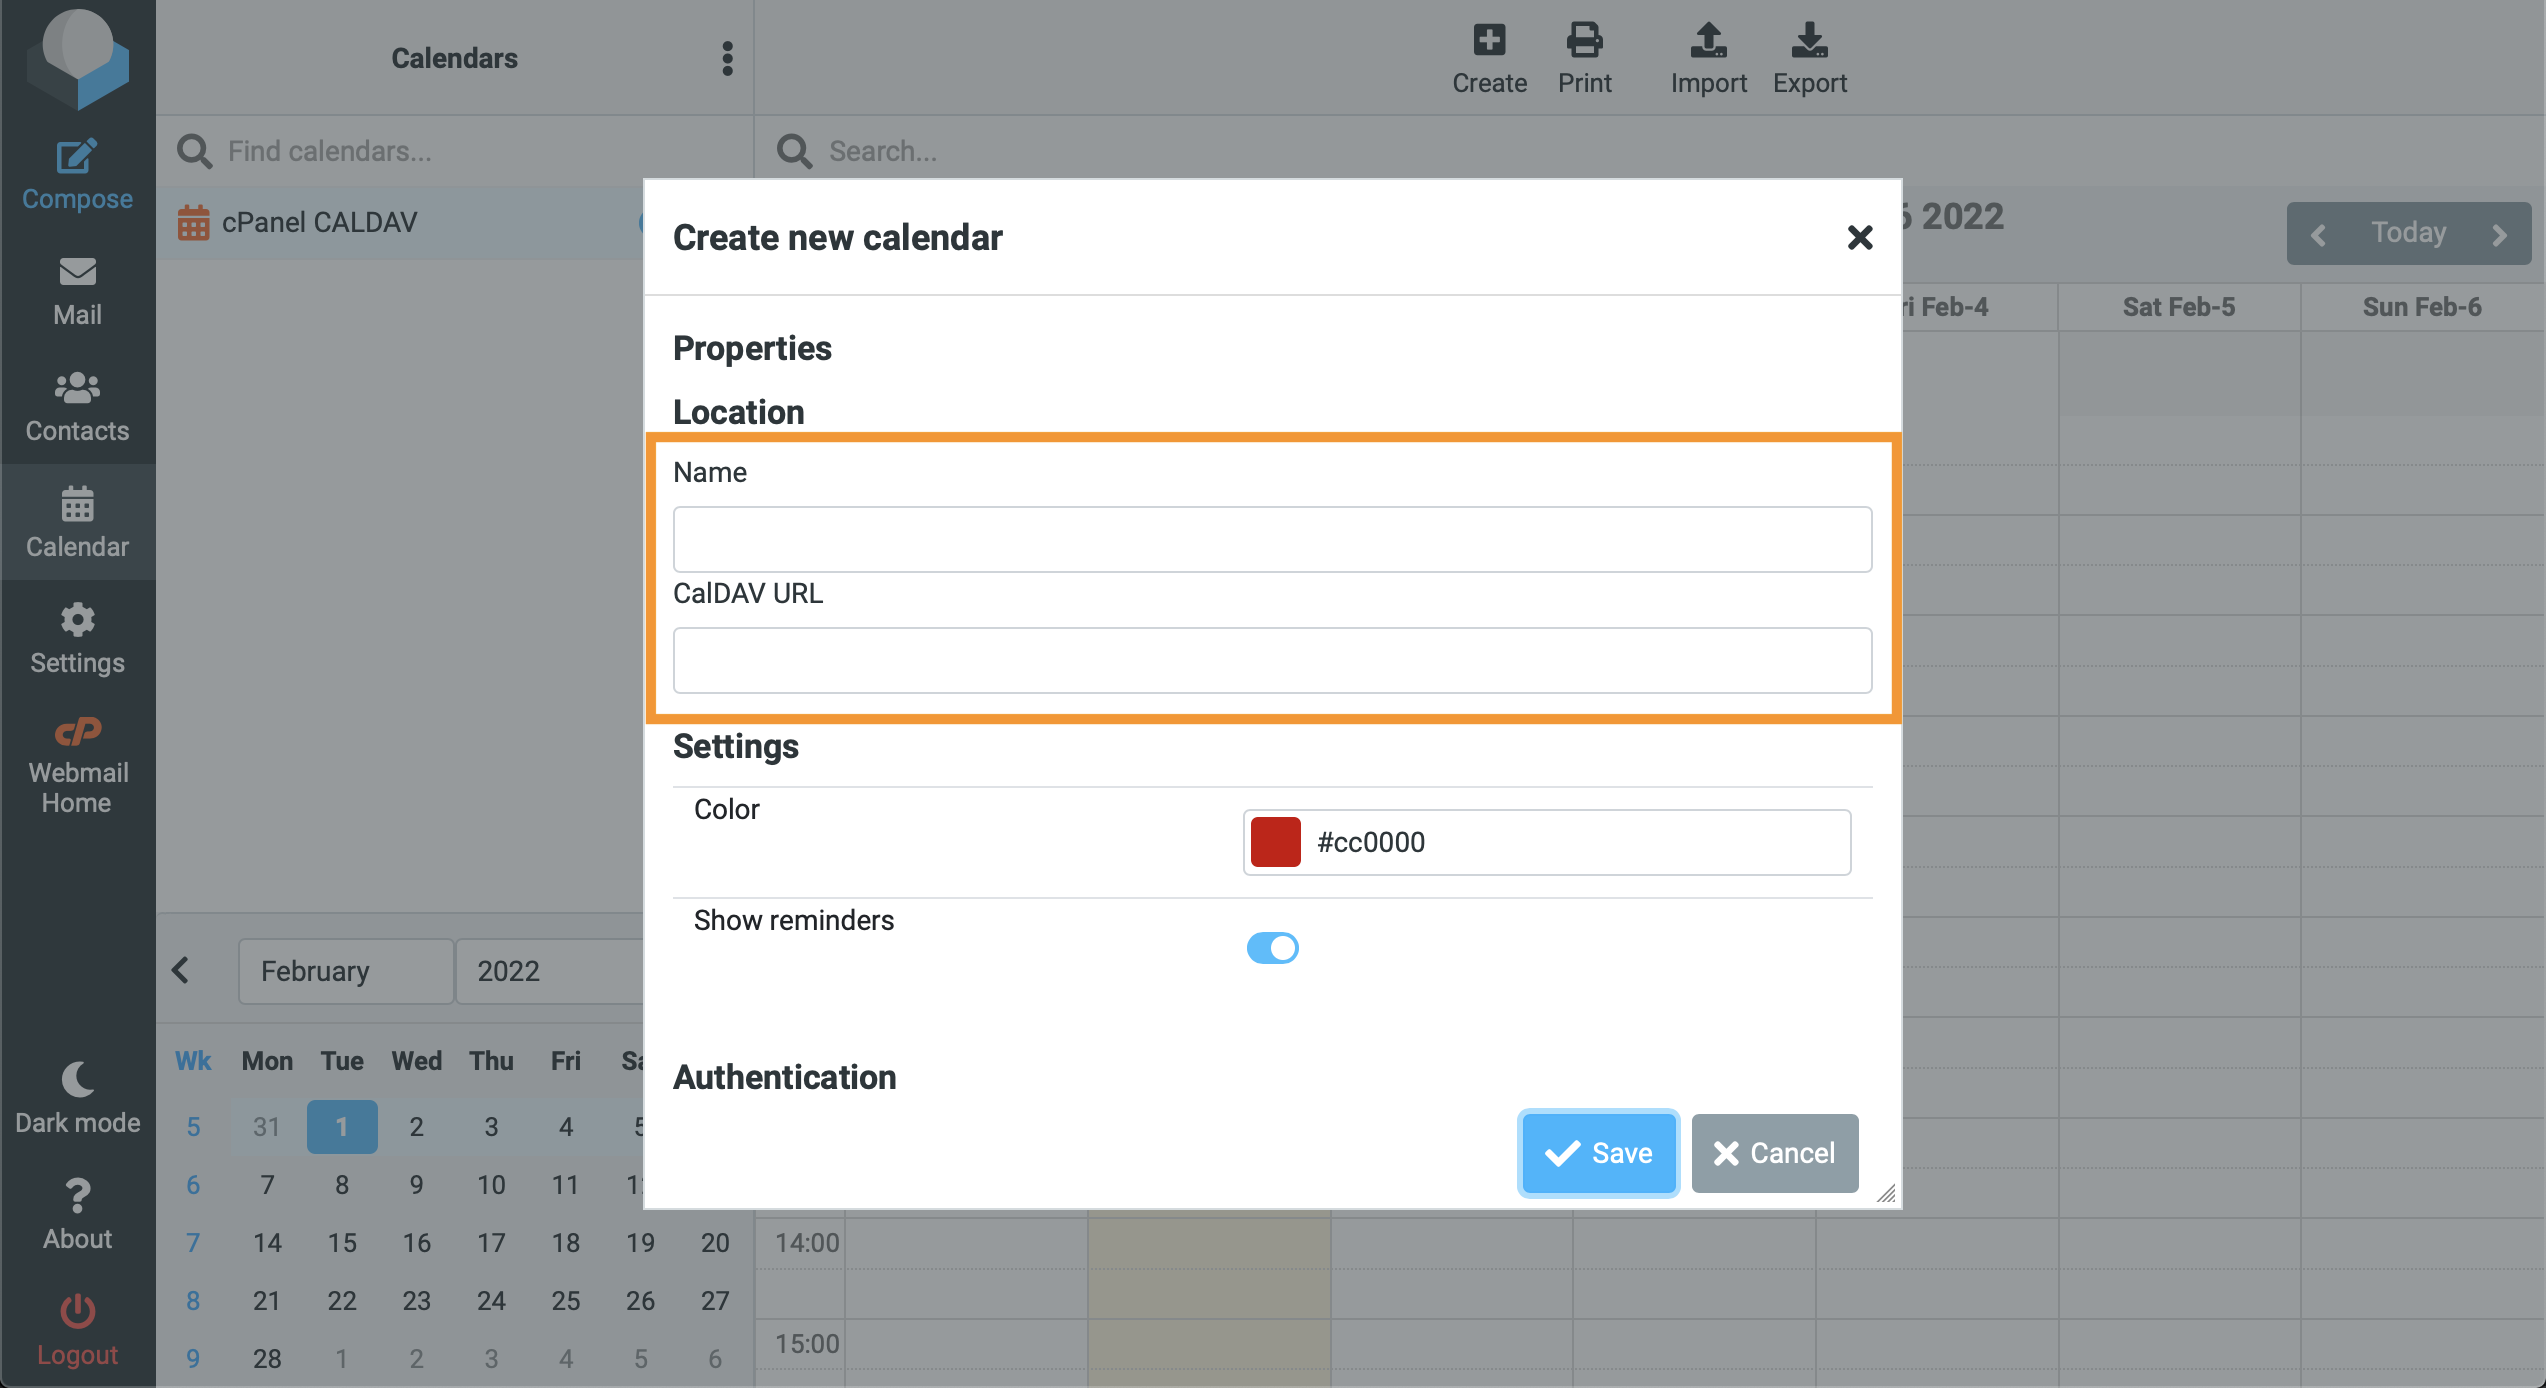
In the Properties section, enter the calendar owner’s calendar name in the Name text box.
-
In the CalDAV URL text box, enter the calendar owner’s calendar URL that you copied in step five of our Get the calendar owner’s calendar URL documentation.
-
Adjust the calendar color and whether to show reminders in the Settings section.
-
Under Authentication, enter the username and password of the calendar delegate CalDAV digest. This is the same as their Webmail username and password.
-
Click Save. The Roundcube Calendar interface will automatically upload the calendar owner’s calendar.
Note:You will see calendar events for the current week.
How to test the calendar delegation
To test the delegation, perform the following steps:
-
Have the calendar owner create an event on their calendar. The calendar delegate should be able to view the event from their own Roundcube Calendar interface.
-
Calendar delegates with permission to edit the calendar can perform the following actions:
-
Edit an event — Click the event. A window will appear with the event details. Click Edit to edit the event.
-
Add an event — Double-click anywhere on the calendar. A New event interface will appear. Fill out the relevant information. Ensure that the user selects the calendar owner’s calendar from the Calendar menu in that window. Once completed, click Save. The event will appear in both the calendar delegate’s and calendar owner’s Roundcube Calendar interface.
-