We log search terms to improve our documentation. For more information, read our Privacy Policy.
Managing Account Settings
Last modified: 2026 September 16
Overview
Manage your Meridian account settings from the Account Preferences interface. You can change your password and enable two-step verification (two-factor authentication or 2FA) for extra login security. You can also choose your preferred language or switch interface themes to fit your workflow. Use this interface to update your contact information, manage which notifications you receive, and connect to a Webpros MCP server. Finally, share your feedback to help us improve cPanel.
To open the Account Preferences interface, click your avatar ( ) icon in the upper-right corner of the header, and then click Profile.
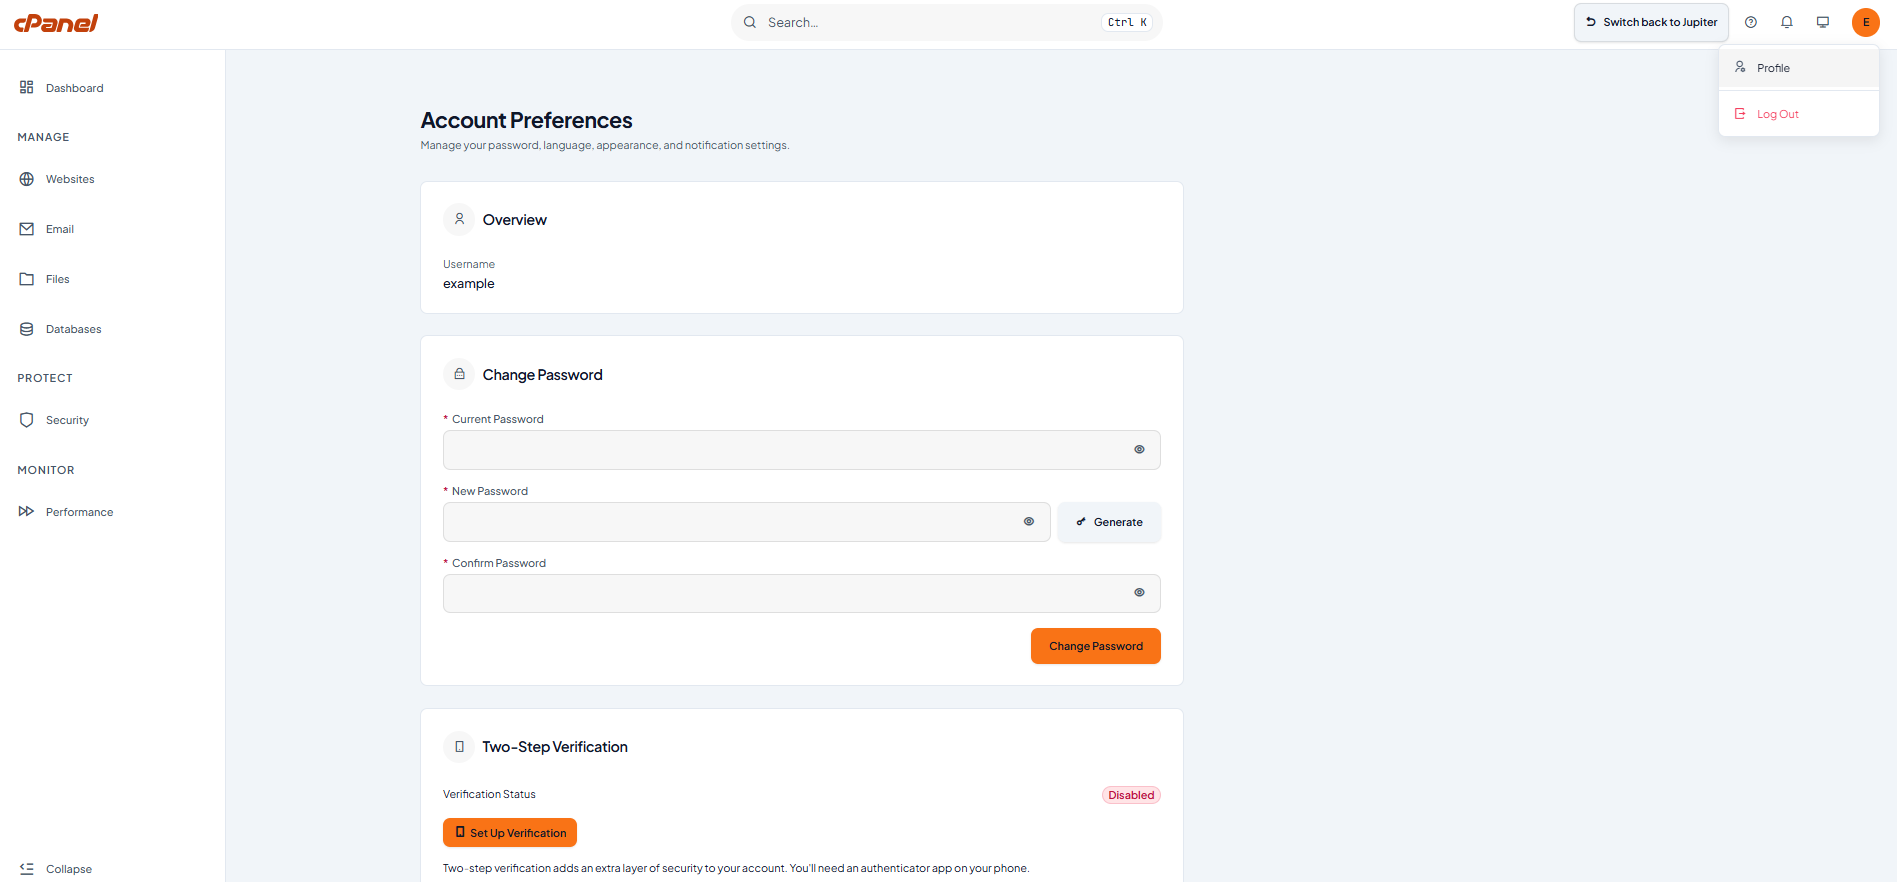
Change your password
To change your account password, perform the following steps:
- Go to Account Preferences and find the Change Password section.
- Enter your current password.
- Enter a new password, or click Generate to create a strong password automatically. As you type, the strength indicator shows how secure your new password is. Make sure that the password reaches a rating of Strong or higher before saving.
- Enter the new password again to confirm it.
- Click Change Password.
When you click Change Password, a confirmation message appears and your session ends. Sign in again with your new password.
Enable two-step Verification
Two-step verification adds an extra layer of security to your account. When you enable this feature, logging in requires your password and a one-time code from an authenticator app on your phone.
To enable two-step verification, perform the following steps:
- Go to Account Preferences and find the Two-Step Verification section. The system disables two-step verification by default.
- Click Set Up Verification to start the setup process.
- Follow the displayed instructions to scan the QR code with your authenticator app.
- Enter the code the authenticator app generates to complete the setup.
After you enable two-step verification, the feature shows as active in the Account Preferences interface.
If you lose access to your authenticator app, contact your hosting provider’s support team.
Change your language
To change the language of your cPanel Meridian theme, perform the following steps:
- Go to Account Preferences and navigate to the Change Language section.
- Select a language from the Language menu. The languages available in the menu depend on what your hosting provider enables.
The interface language updates immediately.
Switch themes
Use the Theme section of the Account Preferences interface to switch between different cPanel themes, such as Jupiter and Meridian:
- Jupiter — Organizes features into menus and categories.
- Meridian — Organizes features around common goals and tasks, with a command palette that lets you jump to any feature or workflow by typing its name.
You can switch between themes at any time if your hosting provider allows it and your account is eligible. For more information, read our Welcome to Meridian documentation.
To switch themes, perform the following steps:
- Go to Account Preferences and navigate to the Theme section.
- Select the theme that you want to use.
Your selected theme shows as Active. Your choice applies only to your account and remains in effect across sessions.
If you switch to Meridian and want to return to Jupiter, click Classic cPanel Theme in the header, or repeat the steps above and select Jupiter.
Interface themes and display settings are separate. Switching interface themes does not change the light and dark appearance. To change the appearance mode, click the display preferences () icon in the header.
Share your preferences
Use the Personalization section to share how you use cPanel. Your answers help us understand your goals, experience level, and priorities so we can improve cPanel.
To share your preferences, perform the following steps:
- Go to Account Preferences and navigate to the Personalization section.
- Select an answer for each of the following questions:
- What are you primarily building? — Select the type of website you run using your cPanel account. For example, Personal blog, Freelance builder, or Online store.
- How experienced are you? — Select a level from Not at all experienced to Extremely experienced.
- What matters most to you? — Select the area you want to focus on. For example, Getting started tips, Performance insights, or Security settings.
Your answers save automatically, and unanswered questions display as Not answered so you can find and complete them later.
You can update your answers anytime. Return to the Personalization section and select a different option from any menu.
Update your contact information
Important account messages, like invoices, security alerts, and expiration notices, go to your primary email address. Keep this address current so you don’t miss critical notifications.
To update your contact information, perform the following steps:
- Go to Account Preferences and navigate to the Contact Information section.
- Update your Primary Email address.
- Optionally, add a Secondary Email address as a backup contact.
- Enter your account password to verify the change.
- Click Save Changes.
Manage your notification preferences
You can receive an email when certain events happen on your account. Choose which events trigger a notification.
To manage your notification preferences, perform the following steps:
- Go to Account Preferences and navigate to the Notification Preferences section.
- Turn notifications on or off for each event. Notification events display in the following groups:
- Account — Your contact email address changes or an external account links to yours for authentication.
- Disk & Quota — Your account approaches its disk quota.
- Bandwidth — Your account approaches its bandwidth usage limit.
- General — Your SSL certificate nears expiry or your account password changes.
- In the SSL Certificate Notifications section, select how many AutoSSL notifications you want to receive:
- Disabled — No SSL notifications.
- Failures Only — Certificate failures and expiry warnings.
- Failures & Warnings — Failures, deferrals, and uncovered domains.
- All Events — All AutoSSL events, including successful renewals.
Your changes save automatically.
Connect to MCP
You can connect Meridian to a WebPros MCP server. This allows you to automate your website deployment and account maintenance using AI tools like Claude Code.
To learn how to connect to MCP, read our Connect to MCP documentation.
Manage API tokens
Use the Connections tab of the Account Preferences interface to create and revoke API tokens, which let scripts and tools authenticate to your cPanel account without your password.
To learn how to manage your API tokens, read our Managing SSH Keys and API Tokens documentation.