How to Log in to Your Server or Account
Valid for versions 100 through the latest version
Version:
100
Last modified: 2026 January 28
Overview
This document explains how to log in to cPanel, WHM, Webmail, and the Command Line Interface (CLI).
Log in
This document uses the following examples:
198.51.100.1represents the server’s IP address.example.comrepresents the server’s domain address.
Select the cPanel & WHM product that you wish to log in to:

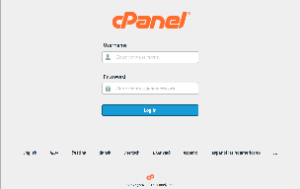
To log in to the cPanel interface, perform the following steps:
- Enter the IP address or domain and the
2083service port in your preferred browser (for example,https://198.51.100.1:2083). - Enter your cPanel username in the Username text box.
- Enter your password in the Password text box.
- Click Log in.
For more information about how to access cPanel, read the How to access cPanel section.

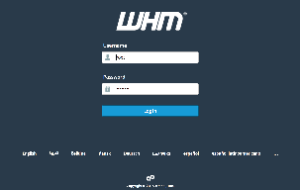
To log in to the WHM interface, perform the following steps:
- Enter the IP address or domain and the
2087service port in your preferred browser (for example,https://198.51.100.1:2087). - Enter your WHM username in the Username text box.
- Enter your password in the Password text box.
- Click Log in.
For more information, read the How to access WHM section.

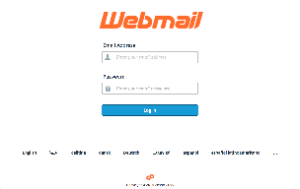
To log in to the Webmail interface, perform the following steps:
- Enter the IP address or domain and the
2096service port in your preferred browser (for example,https://198.51.100.1:2096). - Enter your email address in the Email Address text box.
- Enter your password in the Password text box.
- Click Log in.
For more information, read the How to access Webmail section.
Service URLs
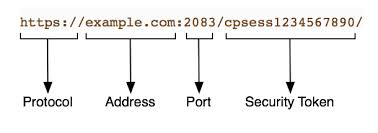
A cPanel & WHM service URL contains the following sections:

| Section | Description | Example |
|---|---|---|
| Protocol | The protocol that your browser uses to communicate with a remote server. cPanel, WHM, and Webmail use the https protocol. This protocol provides HTTP over an encrypted connection. An encrypted SSL connection does not transmit your username and password in plain text. |
https:// |
| Address | The address consists of either an IP address or a domain name. This section of the URL specifies the remote server that you wish to access. When you use a domain name to access cPanel & WHM services, make certain that the domain’s domain name system (DNS) record has propagated across the DNS system.
Note:
If you cannot access the interface with your domain name, use your domain’s IP address. It may take up to 48-72 hours for your domain to propagate after you set up the DNS information.
|
example.com |
| Port number | The port number that the cPanel & WHM service uses. You must specify a port number to access a cPanel & WHM service. To specify a port number, enter a colon (:) and then the port number. |
2083 |
| Security token | The security token that the server appends to your session’s URL. Security tokens help to prevent unauthorized use of a website through Cross-Site Request Forgery (XSRF). Security tokens contain the string cpsess and a 10-digit number. |
cpsess1234567890 |
For more information about cPanel, WHM, and Webmail connections, read our How to Configure Your Firewall for cPanel & WHM Services documentation.
External authentication
Your hosting provider may allow users to access cPanel or Webmail with external authentication credentials (for example, cPanelID, Google® Accounts, Facebook®, or your hosting provider’s portal). This reduces the number of passwords that you need to remember.
If you are a system administrator and wish to activate external authentication methods for your users, read our Manage External Authentications documentation.
- You can link one or more external accounts to multiple cPanel, WHM, and reseller (WHM) accounts.
- You must authenticate through both the two-factor authentication for your identity provider and the two-factor authentication (2FA) on the server, if enabled.
Two-factor authentication (2FA)
Two-factor authentication (2FA) provides security through an additional login step. If you enable 2FA on an account, users must provide a generated six-digit security code in order to complete the login. For more information, read our Two-Factor Authentication for cPanel and Two-Factor Authentication for WHM documentation.
2FA supports only one concurrent session for any user. If you open several browser windows to cPanel & WHM and log out in one of them, the server logs out all the other windows.
How to access cPanel
To access cPanel, you must first have or create a cPanel account. Then, enter the account’s IP address or domain and the 2083 port in your preferred browser. For example:
https://198.51.100.1:2083— Access cPanel over an encrypted connection with your IP address.https://example.com:2083— Access cPanel over an encrypted connection with your domain name.
You can log in with one of the following methods:
Use your cPanel account
To log in with your cPanel account, perform the following steps:
- Enter your cPanel username in the Username text box.
- Enter your password in the Password text box. If you cannot remember your password, reset it or contact your hosting provider.
- Click Log in. The cPanel Tools interface will appear.
If your account uses two-factor authentication (2FA), perform the following additional steps:
- Open your preferred 2FA app in your smartphone to generate a six-digit security code.
- Enter the provided six-digit security code.
- Click Continue.
Use external authentication for cPanel
To log in with external authentication, perform the following steps:
- Select the external authentication identity provider that you wish to use.
- If you need to log in to the identity provider, the identity provider’s login interface will appear. Enter your authentication credentials.
Note:
If you own an account in the cPanel Store, the cPanel Tickets system, or the Manage2 billing system, use that username as your cPanelID. For more information, read our cPanelID documentation.
- Authorize the provider to log in to the server, if needed.
The cPanel login interface appears and displays a message that confirms that you authenticated with the provider.
- If you already linked the identity provider to a single cPanel account, the interface automatically logs you in.
- If you already linked the provider to multiple cPanel accounts, a new interface appears. Select the desired cPanel account or click Link Another Account to link another cPanel account.
Note:
Use the
add_authn_linkUAPI function to add additional accounts. Once you add more than one account, you can link additional accounts in the login interface. - If you need to link the identity provider to a cPanel account, you will see the following message:
Enter your username and password and log in to your account. This action links the external account to your cPanel account.
Your account is not associated with an existing "cPanel" account. Please log in to connect the account.
How to access WHM
To access WHM, enter the IP address or domain and the 2087 port in your preferred browser. For example:
https://198.51.100.1:2087— Access WHM over an encrypted connection with your IP address.https://example.com:2087— Access WHM over an encrypted connection with your domain name.
In order to log into WHM, you must either be the root user, or a user with reseller privileges.
You can log in with one of the following methods:
Use WHM account
To log in with your WHM account, perform the following steps:
- Enter your WHM username in the Username text box.
- Enter your password in the Password text box.
- Click Log in. The WHM Home interface will appear.
If your account uses two-factor authentication (2FA), perform the following additional steps:
-
Open your preferred 2FA app in your smartphone to retrieve the six-digit security code.
-
Enter the six-digit security code that the app provides.
-
Click Continue.
Use external authentication for WHM
To log in with external authentication, perform the following steps:
- Click the button that corresponds to your external authentication identity provider.
- If you need to log in to the identity provider, the provider’s login interface will appear. Enter your authentication credentials.
Note:
If you own an account in the cPanel Store, the cPanel Tickets system, or the Manage2 billing system, use that username as your cPanelID. For more information, read our cPanelID documentation.
- Authorize the provider to log in to the server, if needed.
The WHM login interface appears and displays a message that confirms that you authenticated with the provider.
-
If you already linked the identity provider to a single WHM account, the interface automatically logs you in.
-
If you already linked the provider to multiple WHM accounts, a new interface appears. Select the desired cPanel account or click Link Another Account to link another cPanel account.
Note:Use the
add_authn_linkUAPI function to add additional accounts. Once you add more than one account, you can link additional accounts in the login interface. -
If you need to link the identity provider to a WHM account, you will see the following message:
Enter your username and password and log in to your server. This action links the external provider to your WHM account.Your account is not associated with an existing "WHM" account. Please log in to connect the account.
Use the whmlogin script
The /usr/local/cpanel/scripts/whmlogin script generates a single-use session login URL for WHM. To access WHM with this script, perform the following steps:
- Use SSH to access the server as the
rootuser. - Run the
/usr/local/cpanel/scripts/whmloginscript. The output will resemble the following example:https://198.51.100.1:2087/cpsess1234567890/login/?session=root%3aAqI0aGGAFWI_Mab_%3acreate_user_session%2c31cd420f0fd6aca696a2890f580f2f0a - Navigate to the provided URL in your preferred browser. The WHM Home interface will appear.
How to access Webmail
You can access Webmail directly through your browser or log in to Webmail through the cPanel interface.
Access Webmail directly
To access Webmail, enter the IP address or domain and the 2096 port in your preferred browser. For example:
https://198.51.100.1:2096— Access your Webmail over an encrypted connection with your IP address.https://example.com:2096— Access your Webmail over an encrypted connection with your domain name.
You can log in with one of the following methods:
Use Webmail account
To log in with your Webmail account, perform the following steps:
- Enter your username in the Username text box.
- Enter your password in the Password text box.
- Click Log in. The Webmail interface will appear.
Use external authentication for Webmail
To log in with external authentication, perform the following steps:
- Click the button that corresponds to the external authentication identity provider that you wish to use.
- If you need to log in to the identity provider, the provider’s login interface will appear. Enter your authentication credentials.
Note:
If you own an account in the cPanel Store, the cPanel Tickets system, or the Manage2 billing system, use that username as your cPanelID. For more information, read our cPanelID documentation.
- Authorize the provider to log in to the server, if needed.
The Webmail login interface appears and displays a message that confirms that you authenticated with the provider.
- If you already linked the provider to a single Webmail account, the interface automatically logs you in.
- If you already linked the provider to multiple Webmail accounts, a new interface appears. Select the desired Webmail account or click Link Another Account to link another Webmail account.
Note:
Use the
add_authn_linkUAPI function to add additional accounts. Once you add more than one account, you can link additional accounts in the login interface. - If you need to link the provider to a Webmail account, you will see the following message:
Enter your username and password and log in. This action links the external provider to your Webmail account.
Your account is not associated with an existing "Webmail" account. Please log in to connect the account.
Access Webmail from the cPanel interface
To access Webmail from the cPanel interface, perform the following steps:
- Navigate to cPanel’s Email Accounts interface (cPanel » Home » Email » Email Accounts).
- Click Check Email in the actions column in the row that corresponds to the email account that you wish to access Webmail. The Webmail interface will appear.
How to use SSH to log in to the command line
Many system administration tasks and some website administration tasks require that you access the server from the command line interface (CLI). For information about how to log in on the command line, read our How to Access the Command Line documentation.
Your hosting provider controls who can log in via the command line. If you require CLI access, contact your hosting provider.
Change the login interface locale
Changing the locale in the interface will change the default language the interface uses. To change the login interface’s locale, click the desired locale’s name at the bottom of the interface. If you do not see your locale, click ... to display a full list of available locales. After you select a new locale, the login interface will refresh using the new locale.
- If your browser’s
Accept-Languageheader exists, then the login interface attempts to display the locale that corresponds to your browser setting. If the browser’s header requests an unavailable locale, the login interface appears in English. - When you change the locale, the interface sets a cookie in your browser that expires after one year. You must reset the locale whenever you log in to an account from a new browser, when you delete cookies, and after the cookie expires.
Resolve login security message
You may see a There is a problem with this website's security certificate. message when you log in to cPanel, WHM, or Webmail.
For information about how to resolve this security message, read our Automatic Hostname SSL Certificate Replacement documentation.