How to Create and Connect to an Email Account
Last modified: 2025 June 6
Overview
This document explains how to create an email account and connect to it.
Create email account
To quickly create a new email account, perform the following steps:
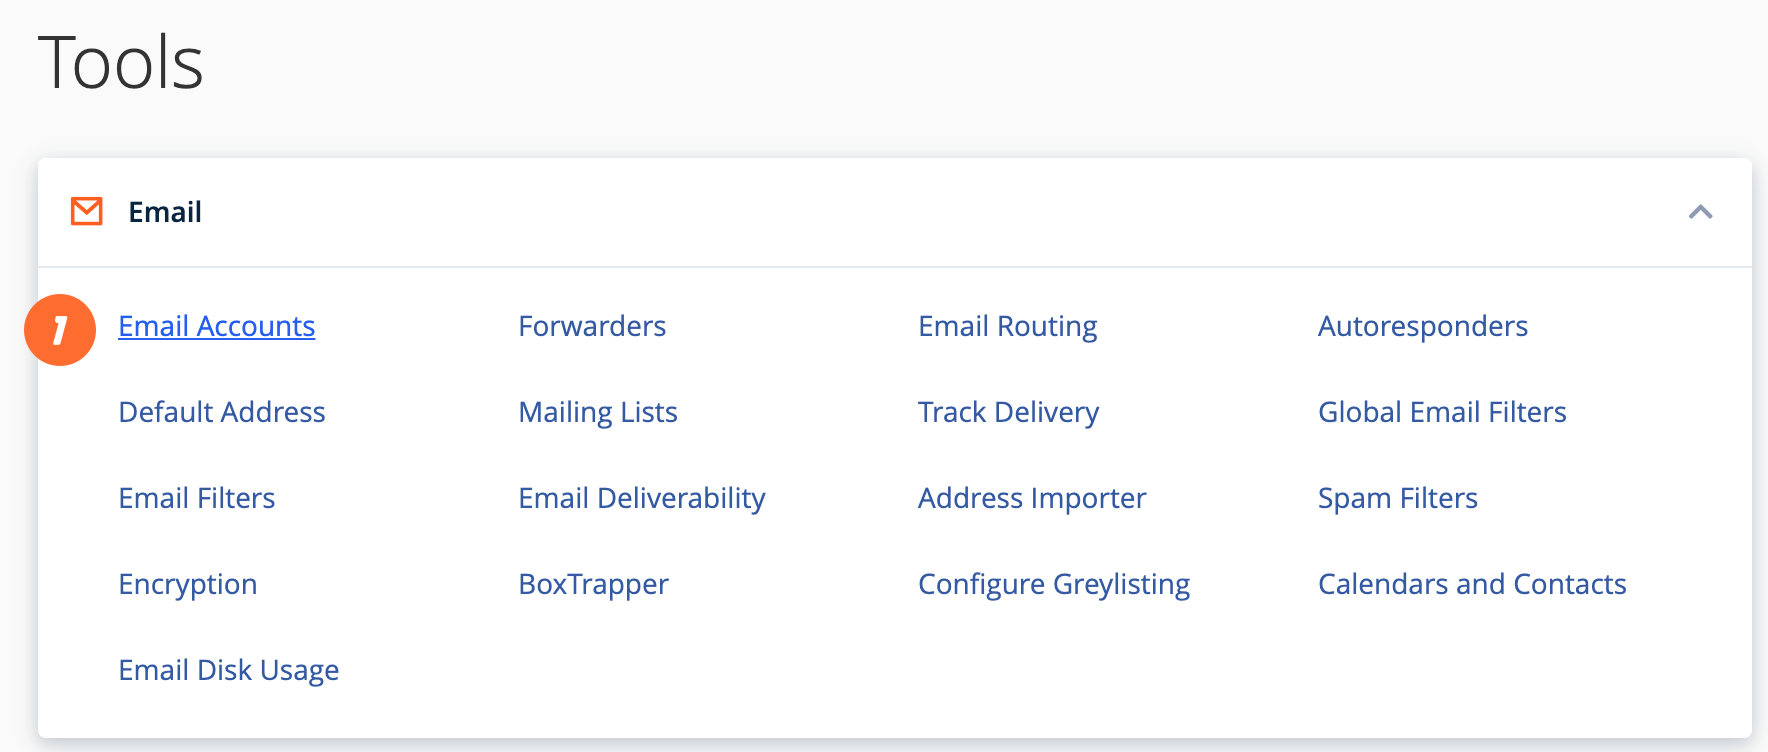
- Navigate to cPanel’s Email Accounts interface (cPanel » Home » Email » Email Accounts).
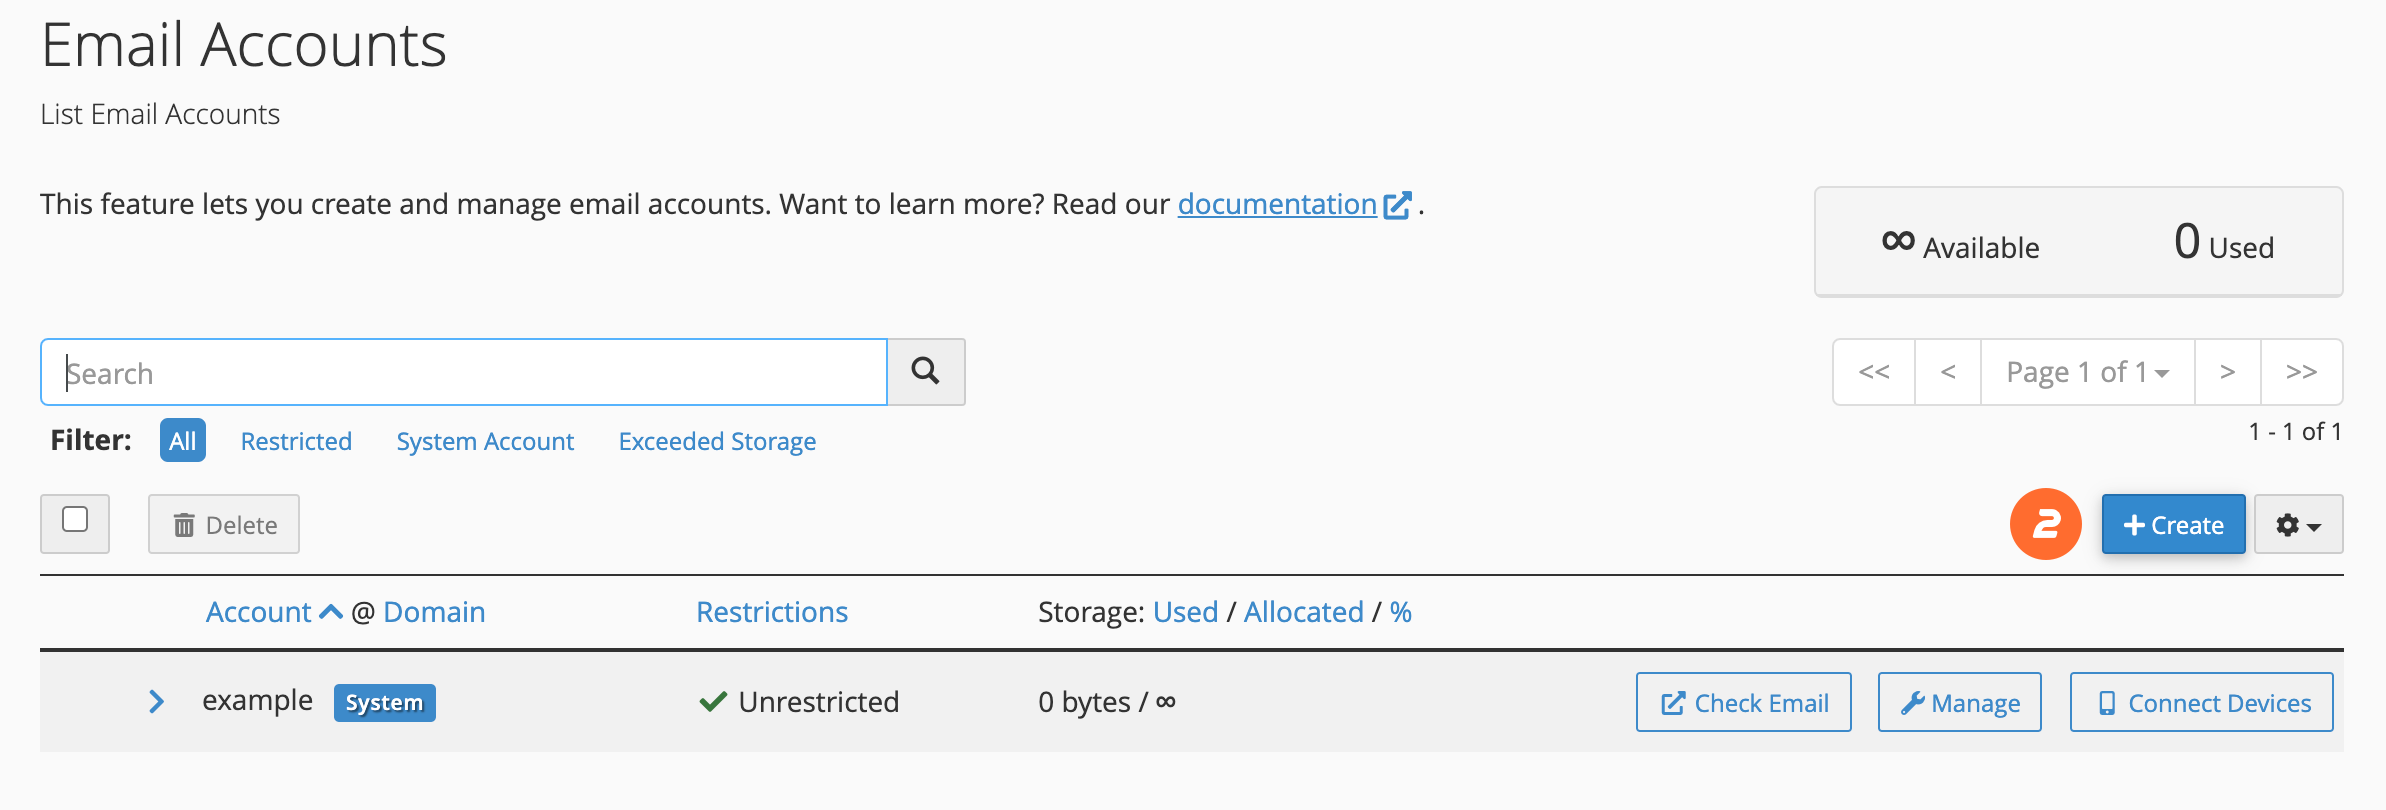
- Click Create. A new interface will appear.
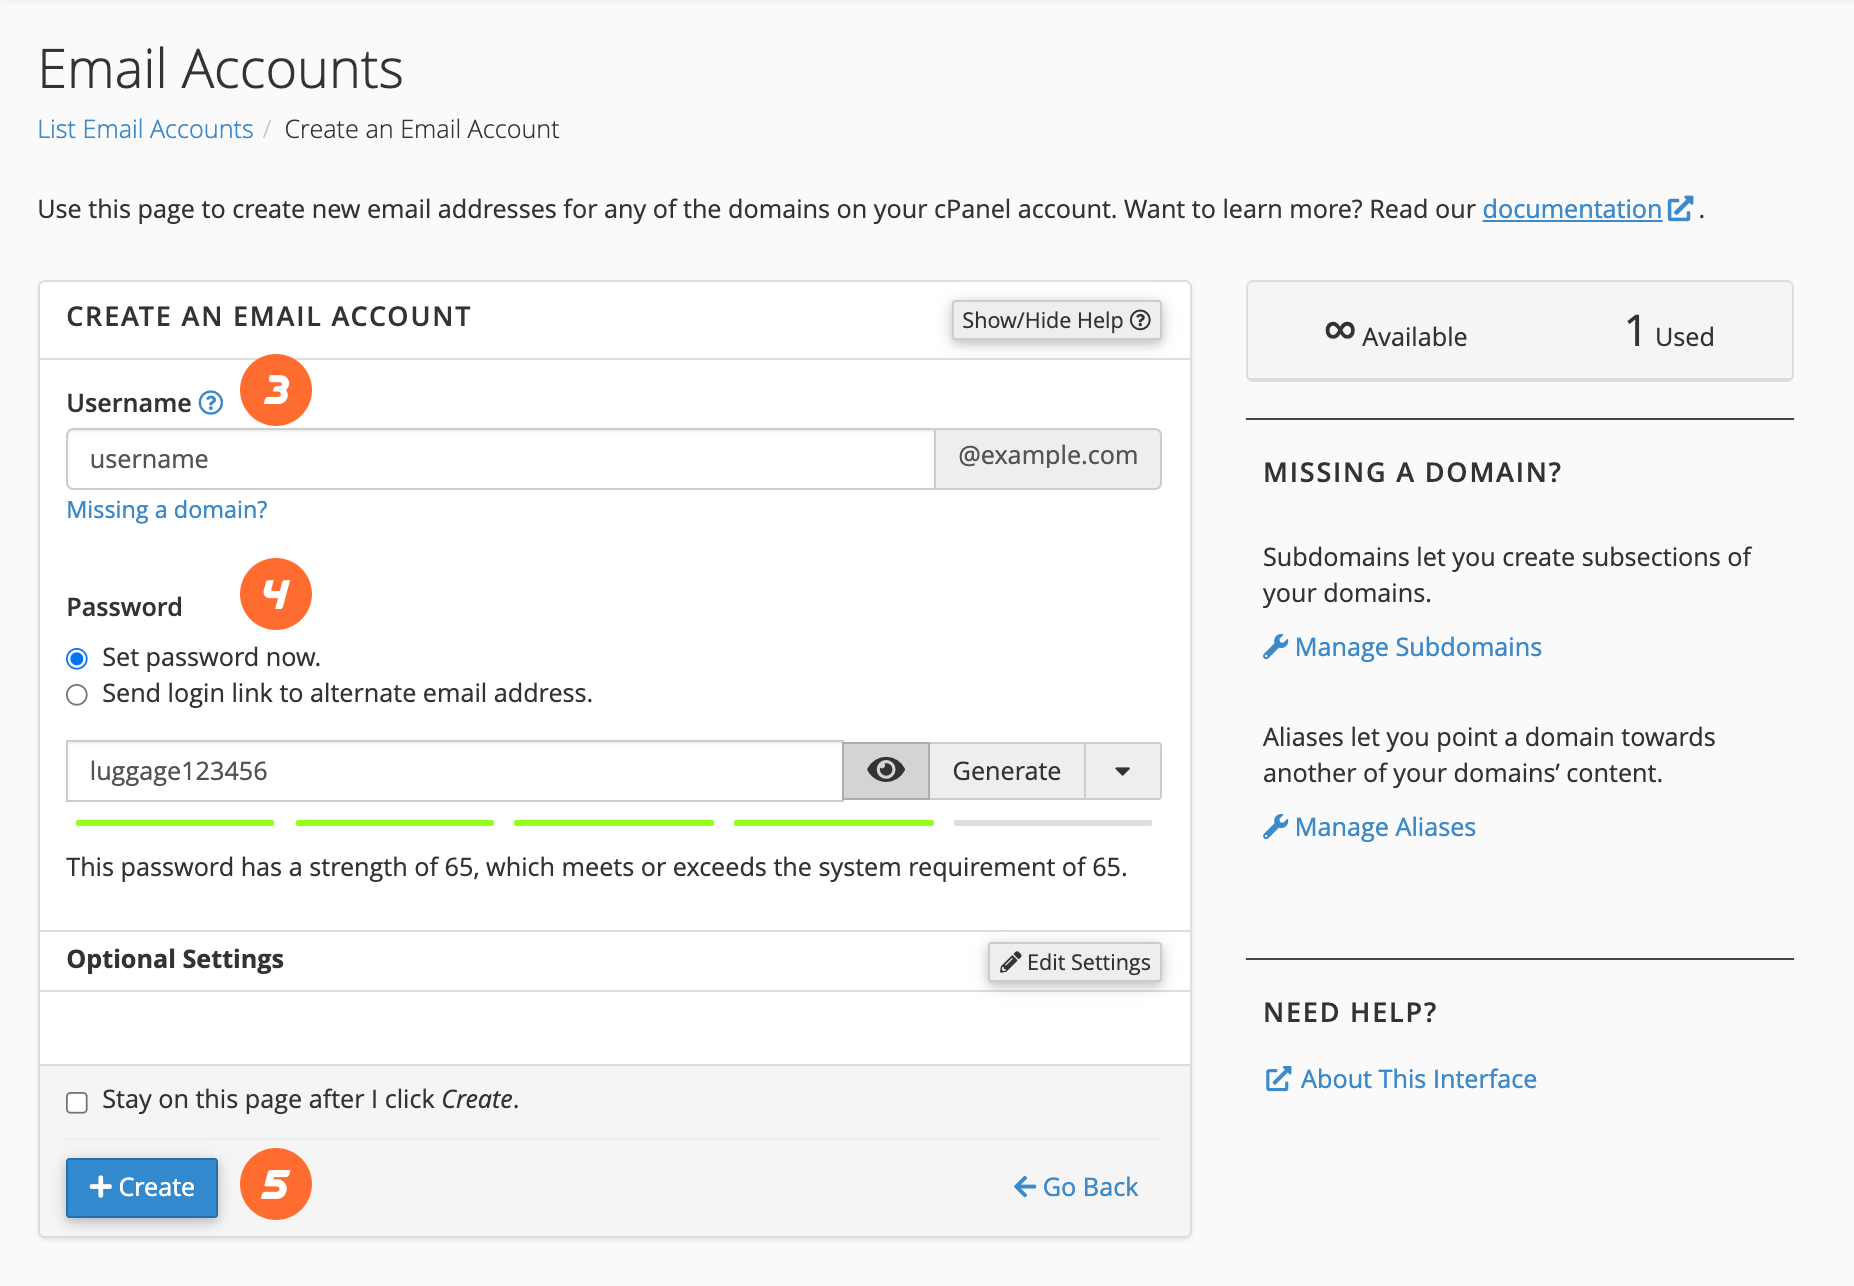
- Enter a new email address in the Username text box.
- In the Password section, enter a secure password in the Password text box.
- Click Create to create the account.
For more options and information about this interface, read our Create an Email Account documentation.
Use Webmail to check your account
To check your email account through Webmail, perform the following steps:
- Navigate to
https://example.com:2096in your preferred browser, whereexample.comrepresents your domain name. - Enter the username part of your email address in the Email Address text box (for example,
usernamefor the[email protected]address). - Enter your password in the Password text box.
- Click Log in.
For more information, read our The Webmail Interface documentation.
Configure a device to check your email
To set up an iOS® or Android™ device to check your email, read our How to Set Up a cPanel Email Account on iOS® and Android™ documentation. It includes helpful steps and screenshots that will walk you through the process.
Configure a client to check your email
cPanel provides configuration scripts for many popular mail clients.
- Navigate to the cPanel’s Email Accounts interface (cPanel » Home » Email » Email Accounts).
- Click Connect Devices.
- Locate the mail client you will be using in the Application section of the Mail Client Automatic Configuration Scripts section.
- Review the system’s instructions, then click Proceed to continue. The system will then attempt to download the script. If it prompts you to open, run, or save the script file, select Run or Open to continue.
- The system may ask if you are sure you want to install the script file. Select Continue or Yes to continue the installation.
- The system may prompt you for the email account’s password. Enter the password and click Install.
- When you complete the process, your mail client will open and log in to your email account. If your account has a lot of email, it will take a while to download and synchronize.
If your mail client does not appear in the list, read the Mail Client Manual Settings section of our Set Up Mail Client documentation.
Set up your calendar and contacts
To set up calendars and contacts on MacOS® or iOS®, read our How to Set Up Calendars and Contacts documentation.
Remove access to email
To disable access to email, remove the account from the device that is accessing the email. If you do not have access to the device, change the password to the email account using the Security section of cPanel’s Manage Email Accounts interface (cPanel » Home » Email » Email accounts » Manage).