We log search terms to improve our documentation. For more information, read our Privacy Policy.
Social Media Management (Powered by SocialBee)
Last modified: 2026 July 8
Looking for this interface?
Your hosting provider can enable or disable this interface in WHM's Feature Manager interface (WHM >> Home >> Packages >> Feature Manager).
WebPros International, LLC currently provides this feature in a limited release, with plans to expand its availability in future updates.
Overview
The Social Media Management (Powered by SocialBee) interface helps you create and manage social media campaigns for the domains hosted on your cPanel account. Through this interface, you can easily manage your posts and ensure consistent engagement on multiple social media networks, including Facebook®, LinkedIn®, and X™ (formerly Twitter™). You can also schedule and reuse content across these networks.
- This interface uses the SocialBee platform to generate a social media strategy for your websites. To make full use of this interface, you must either sign up for a SocialBee account or log in to an existing SocialBee account.
- When you log in to the SocialBee website for the first time, you will automatically get a free 14-day trial. After 14 days, you must purchase a SocialBee license to continue using the SocialBee website.
- To use the Social Media Management feature, your domain must meet the following requirements:
- Have a valid IP address in DNS.
- Have a website already set up.
Social Media Management landing page
The first time you access the Social Media Management interface, a landing page will appear. The landing page displays the following sections:
- The Create a social media campaign for your profile in just 5 minutes. section.
- The Already have an account with SocialBee? card.
- The Not in charge of Social Media? card. If you are not in charge of social media for your domain, copy the socialbee.com link and share it with your marketing team.
Create a social media campaign for your profile in just 5 minutes
To create a social media campaign for your domain, perform the following steps:
- In the Search for your website text box, select or enter the domain for which you want to create a social media campaign.
- Click Let’s get started. A new interface will appear.
- Follow the instructions in the Set up Social Media Management section to create your social media campaign.
Already have an account with SocialBee
If you already have an account on the SocialBee platform, you can access it by clicking Click here to log in. The SocialBee login screen will appear in a new browser window. Follow the instructions in the window to log in to your SocialBee account.
Set up Social Media Management
Perform the following steps to set up the Social Media Management feature.
Business info
The Social Media Management feature automatically gathers information about your company or organization from your website. You must accept or update this information.
To accept or update this information, enter or select the following values in the Business info interface:
- The name of your company or organization.
- The motto or tagline of your company or organization.
- The services that your company or organization provides.
- Your brand’s tone of voice.
Note:
You can only select one tone of voice.
- Your target audience.
- The language for your social media posts.
You must click Continue after you have entered, updated, or selected each value.
Then, click Create social media strategy. The Suggested social networks interface will appear.
Or, click Clear inputs to start over and re-enter your information.
Suggested social networks
The Suggested social networks interface displays your company’s or organization’s existing social media profiles, the percentage of your followers that access them, and their suggested posting frequencies. If your website does not include any social media profiles, the interface displays recommended social media networks and their suggested posting frequencies.
Click Generate posts. The Generated posts interface will appear.
Generated posts
The Social Media Management feature generates sample social media posts with text and images for the suggested social networks based on your company or organization data. You can delete or regenerate these posts in the Generated posts interface, and you can edit them later on the SocialBee website.
- To delete a post, click the trash can icon (
 ) for the post.
 - To regenerate a post, click the reload icon (
 ) for the post.
If the interface displays fewer than seven posts, the A strong posting plan requires more than 6 posts. banner will appear. You must click Generate more posts to generate additional posts.
Click View posting plan to accept the posts. The Posting plan interface will appear.
Posting plan
The Posting plan interface displays a calendar with a suggested posting plan for when to make your social media posts during the next week. The posting plan includes dates, times, and suggested content.
You can make changes to the posting plan afterward on the SocialBee website.
After you have reviewed the posting plan, click Continue. A new interface will appear.
Connect profiles
Before you can use the Social Media Management interface to create social media posts, you must connect your social media profile(s). To connect your profile(s), perform the following steps:
- Click Open SocialBee. The SocialBee login page will appear in your web browser.
- Create a SocialBee account.
- Once you have created a SocialBee account, connect the profile to your SocialBee account.
After you create a SocialBee account, you will receive weekly analytics reports via email for your connected social media profile(s). To stop receiving these reports, disable the Email me a weekly Analytics report. setting on the Notification Settings page in SocialBee.
Use Social Media Management
Once you have completed the setup process, refresh the Social Media Management interface.
The Social Media Management interface displays the following sections:
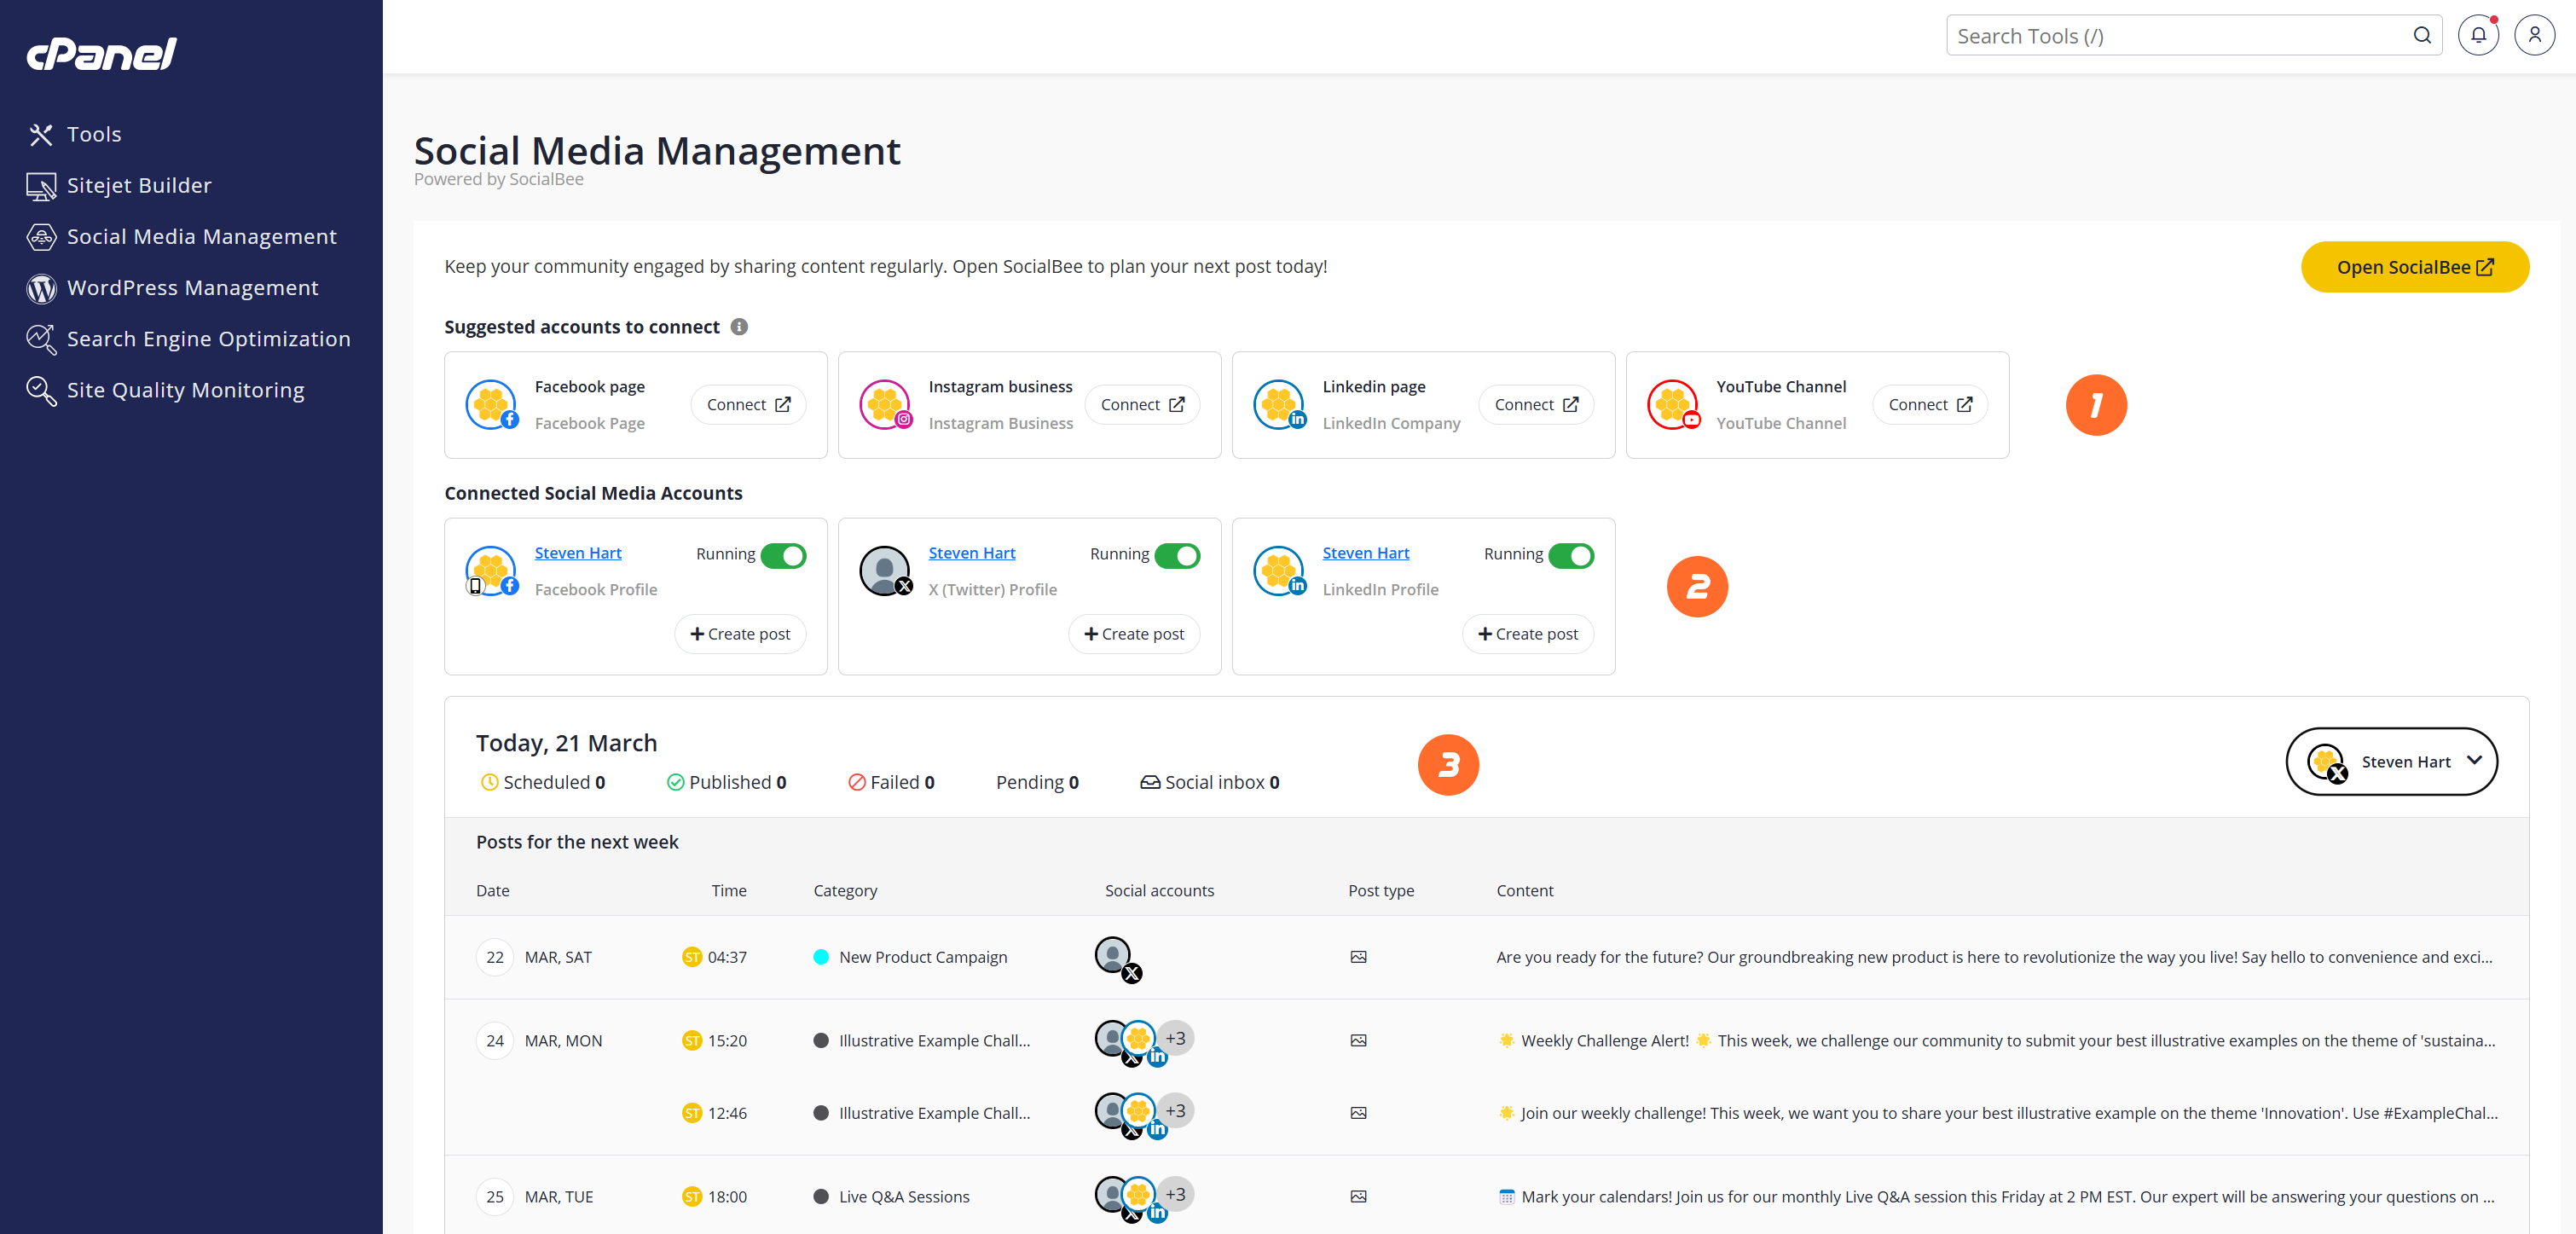
Suggested accounts to connect
This section displays suggestions of profiles to connect. To connect a profile, click Connect for that profile, then log in to the SocialBee website and connect the new profile.
Connected Social Media Accounts
This section will only appear if you have already connected one or more profiles to your SocialBee account.
This section displays the social media profile(s) that you have already connected. To pause the connection between the Social Media Management feature and the profile, unset the Running toggle for the profile.
To create a post, click Create Post for the profile, then log in to the SocialBee website and add the post. After you have created the post, refresh the Social Media Management interface to see the post you created in the posting calendar.
Posting calendar
The posting calendar displays a suggested and actual schedule for posts for each of your connected profiles. To display the schedule for a specific profile, select that profile from the menu.
The calendar displays today’s date, the number of scheduled, published, failed, and pending posts, the number of messages in the profile’s inbox, and the Posts for the next week table.
The Posts for the next week table displays the following information for the current week:
| Field | Description |
|---|---|
| Date | The scheduled or actual date of the post. |
| Time | The scheduled or actual time of the post. |
| Category | The category of the post. |
| Social accounts | The social media account(s) that published or will publish the post. |
| Post type | The type of post. |
| Content | The content of the post. |
If you have not connected any profiles to your SocialBee account, the posting calendar does not display this information. Perform the following steps to connect your profile(s) and display the calendar information:
- Click Schedule posts. The SocialBee website will appear in your web browser.
- Follow the instructions on the SocialBee website to connect your profile(s).
- Refresh the Social Media Management interface to view the updated calendar.