Last modified: 2025 June 10
Looking for this interface?
Your hosting provider can enable or disable this interface for resellers in WHM's Edit Reseller Nameservers and Privileges interface (WHM >> Home >> Resellers >> Edit Reseller Nameservers and Privileges).
Overview
This interface allows you to change an account’s disk space quota.
What is a quota?
Quotas specify the maximum amount of disk space that an account can use on your server, though they do not limit changes to MySQL® or PostgreSQL® databases.
Quotas that include database space only affect cPanel-related functions.
We enable quotas by default on new cPanel & WHM installations. We recommend that you set appropriate quotas for each account on your server. For example, users who wish to host video content need more disk space than a user who only hosts a blog.
The backup process for an account near or over its quota may fail because the system cannot write necessary files, such as a database lock file.
Quotas and operating systems
Quotas interact with operating systems in the following ways:
-
If you disable and then reenable quotas, servers that use the XFS® filesystem and run AlmaLinux OS 8, Rocky Linux™ 8, CloudLinux™ 8, or Ubuntu® require additional actions for quotas to function properly:
- WHM Interface — Use WHM’s Initial Quota Setup interface (WHM » Home » Server Configuration » Initial Quota Setup) to configure quotas.
- Command Line — Run the
/usr/local/cpanel/scripts/fixquotasscript and then remount the file system. - Manually via the Command Line — For instructions on how to perform the
/usr/local/cpanel/scripts/fixquotasscript’s actions manually, read the Red Hat® XFS and XFS Quota Management documentation.
-
CloudLinux updates may break quotas. For this reason, after each CloudLinux update, you must run the
/usr/local/cpanel/scripts/fixquotasscript and then remount the file system.
Quotas and system processes
Processes that the system runs, such as PHP scripts that create files, can create user-owned files until the number of files reaches the quota. This situation occurs because the kernel-enforced quota does not access cPanel settings.
Change quotas
To change a quota, navigate to the Quota Modification (WHM » Account Functions » Quota Modification) interface. The table displays a list of your cPanel accounts. The Search text box allows you to search by user or domain. You can also choose to display the list by All, Users, or Domains.
If your WHM account only manages one cPanel account, the account’s bandwidth information will appear. If your WHM account does not manage cPanel accounts, you cannot modify quotas in this interface.
To change an account’s quota, you must access its bandwidth information with one of the following methods:
- To change a single quota, select the desired account and click Modify at the bottom of the interface. The bandwidth information for the selected account will appear.
- To view all of your users’ quotas, click Show all Accounts at the bottom of the interface. The bandwidth information for the accounts will appear. If you chose to view all of your accounts, click Show Only this Reseller’s Accounts under a reseller’s username to view only that reseller’s accounts.
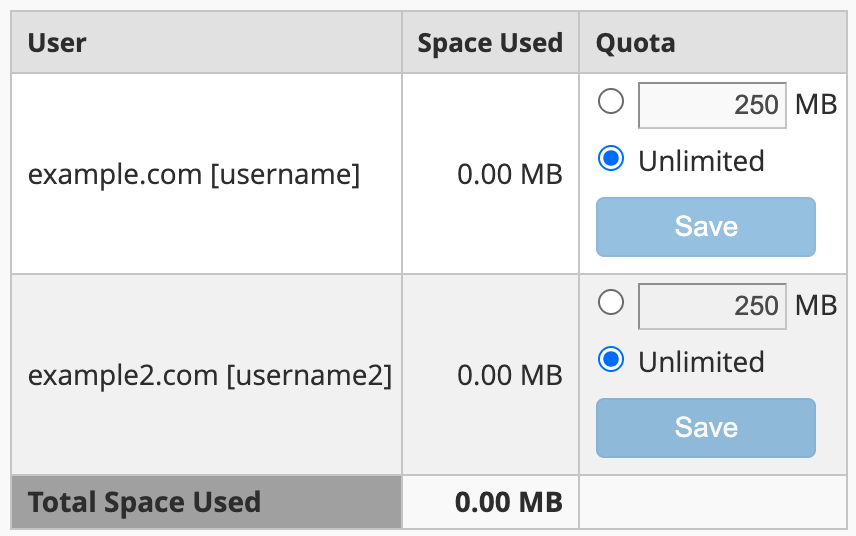
The bandwidth information displays an account’s domain, username, their current disk space usage, and their quota. It resembles the following image:

To change a quota, enter the new quota for each account in the appropriate text box, in megabytes (MB), or select Unlimited to grant the user unlimited disk space. Click Save.
- If all of your accounts’ quotas incorrectly display as
0, rebuild your system’s quota files. Click the click here link, or, if the interface does not display a link, use WHM’s Initial Quota Setup interface (WHM » Home » Server Configuration » Initial Quota Setup). If you have enabled Quota System Administration notifications, the system sends notifications when it is ready to reboot and when the quota scan finishes and quotas are functional. - If a discrepancy exists between an account’s quota and the results of the
du -sh /home/usernamecommand, the user’s UID may own other files on the system. To find the locations of the user’s files, run thefind / -user username -lscommand, whereusernameis the username.